Saturday, August 13, 2016

It's almost time to head to school!

Now that you've sat down and made a list of all of the tasks you need to do to get ready for the coming school year you are one step closer to going in to your classroom!

Here is my list:

Once you've made your list - it's time to color code.
I needed 3 colors for my list - you may need more or less.


The three categories I used were:

Orange - Things that I can type at home, and then just print and laminate at school, and bring back home to cut.

Pink - Things that I can do exclusively at home.

Blue - Things I have to do at school


As I was making my list I discovered that I also needed a couple of other lists - one to organize the items that I need to bring in to school with me, and another to list all of those fun Pinterest projects that I would love to do - but know I don't NEED to do to successfully start the year.  I also like making lists, so this strategy just works for me.

Next step - make a schedule for your three hours!

Using my to do list I focused on the things that needed to be done AT school and based my schedule on those things.  This is the schedule I'm going to attempt to use:

30 minutes - Set up classroom furniture                   


  • Student Desks - create groups (hint - I've already been looking online for arrangements I may want to use.)  I've taken some screen shots on my phone so that as I'm moving desks I can look at pictures quickly and not have to stop and look up pictures.
  • Other furniture - teacher desk, shelves, etc.
  • Set up classroom technology

20 minutes - Print, copy, laminate

  • Turn on laminater! :)  We all know, it takes a little bit to heat up!
  • Print student name tags - (that were typed at home).  Desk nameplates, name tags for my lunch count chart, name tags for my homework turn in chart, and wearable name tags.  
    • I make my own desk name plates - and then just copy and laminate a clean set as the year goes on and new ones are needed.  They can be printed on card stock but printing on colored paper and laminating works just as well.  Here are a few of the ones I have on my TPT store!
  • Print library book bin labels.
  • Laminate everything that needs to be laminated.  
  • Cut only the library book bin labels.  Roll the rest up and pack it up to cut at home.

15 minutes - Mailboxes

  • Label student mailboxes with first names
  • Distribute day 1 paperwork to each mailbox

20 minutes - Classroom Library

  • Organize books into new book boxes in the classroom library.
  • Put new labels on boxes.

35 minutes - Boards

  • I have three decent sized boards in my room.  All need borders, backings, and a few things need to be posted. 
At this point we've used 2 hours...

Last Hour...All of the loose ends!

  • During this last hour tie up all of the loose ends.  All of the little odd jobs that just need to get done.  For me these are:
  • Write morning message for day 1 of school
  • Sharpen pencils - distribute to desks
  • One that is exclusive to me - this year I need to fix my easel.  I figure it will only take 5 minutes, but it needs to be done.  The little plastic bottoms are gone on the feet of my easel and it's going to keep scratching my floor if I don't fix it.
  • Distribute supplies to student desks (textbooks, etc.)
  • Organize teacher desk area
  • Make any copies for the first week with any time available.

A few important things to keep in mind as you enter your 3 hours of classroom time... 

  • Set a timer!!  I can't stress this enough.  Once you've made a schedule, stick to your time limits as much as possible.
  • Don't chit chat with your friends!  I'm SO SO guilty of this one.  Sorry friends who work with me - you know I would love to catch up - but it will happen at some other time, not during my 3 hours of classroom set up.  Perhaps after set up is over we can catch up over lunch!  I'm actually going to mostly stay right in my room for the 3 hours aside from when I'll copy and laminate - and I'm going to tell everyone who stops by to say hi that I've challenged myself to do this in a time limit - and that I'll stop to catch up with them when I'm done.  Yes, this will be one of the hardest parts of the 3 hour challenge...
  • Don't forget to bring your water bottle and snacks - especially important if you work in a hot building with no AC like I do.  This will help keep you moving.
  • If possible - bring a helper (this isn't possible for me, but I have done this in the past and it is a HUGE time saver!).
I can't wait to hear how you do!!  Head on over to the Hooting About Learning Facebook page to share your experiences and support one another!  It's going to be a GREAT year!!


Wednesday, August 10, 2016

3 Hour Classroom Prep Challenge - The Beginning

Thanks to everyone who is interested in giving this a try!  This is the first installment in a series of posts designed to help all of us spend more time doing fun summer things and less time in our classrooms preparing for the new year!

I totally recognize that it's going to take more than 3 hours to get everything done.  I'm just committing to 3 hours of time spent in my actual classroom.  That means prepping things - mostly after my kids have gone to bed each night - at home.  But, the trade off is that I'm *hopefully* saving myself hours worth of work that would have happened IN my classroom by being more purposeful with my tasks and time.  So, all of those days that the old me would have spent in my classroom are going to be a thing of the past!  Instead I'll spend that time enjoying the last days of summer with my family.

So, our first task!

Sit down and think about all of the things that you need to do, make, organize, etc. in preparation for a new school year.  As you think of each thing write it down on a list.  I know, it's going to be a long list.  My list is always long.  But, a list is the best place to start so that we can be efficient in our next steps.  I've even made a graphic organizer to use if you find it helpful to you in your list making.

3 Hour Classroom Prep Challenge - To Do List


Be sure to share your progress on the Hooting About Learning Facebook page!


Two years later... back to blogging!

Two years ago I began this blog.  Two years?!  How is that even possible?!  Well, I know it's possible, because a LOT has happened in the last two years!!  Our family has grown and so did the size of my classes - and between those two things life became exceptionally hectic and my focus wasn't on blogging... shocking, right?!  :)

All of these things have brought me to the place where I am now personally and professionally.  I need to use my time very efficiently, both at school and at home.  One of my colleagues introduced me to the OHIO method.  OHIO stands for Only Handle It Once.  OK, so admittedly i'm not always perfect at this - but it has certainly helped me a lot.  My new normal is that when I have something in my hands - no matter what it is - I deal with it right then.  So, for example, if I have a piece of paperwork needing to be filed - I file it.  I don't put it in a basket that is labeled "to file" and then never get around to it - or have the basket become so full that now the task is daunting.

So, now onto my life as a teacher - because that is really why you are probably reading my blog in the first place.  OHIO has helped (see above), but this summer I didn't go in to school much at all.  Especially compared to what I've done other summers.  Why?  Well, that answer can be found by looking at the weather we've had this summer.  Massachusetts has been in a major drought.  What does the drought have to do with school and my classroom???  My personal rule for summer always was that I would go in and work on rainy days.  We have had VERY few of those - and the few we had, I already had other plans.  So, here we are, with time ticking on summer, and my classroom still needing to be set up and organized for the coming school year.

While scrolling through Facebook the other day I saw a fellow blogger post a video that showed how she set up her classroom in just 3 hours.  3 hours I thought?!  No way!!  Well, she did it - and her room looks a lot like mine does now - boxes of things moved from their usual homes for summer storage.  The one huge difference I noticed is that she had a lot of nice in classroom storage which I do not, but hey, I'm up for the challenge anyway!!  So, this is the beginning of my "3 hour classroom prep challenge" series!  Are you willing to take the challenge with me?????

I know what you are thinking... "I can't do that!"  "It's not NEARLY enough time!".  Well, the blogger I watched did - and I'm going to try to do it as well, but with my own spin.

THE CHALLENGE...
Spend just 3 hours at your actual classroom setting up.
     **Just think of all the extra time you'll have to be at home, watching the Olympics, reading, doing ANYTHING you want!

This means... do all of those little preparation tasks from HOME before you go to school.    I'll outline them for you in my upcoming blog posts.  Do them in your living room, on your patio, where ever you are comfy!  You don't even have to get out of your pjs!  Take the challenge with me!  Let's see if we can do this together!!!

Oh, and if you are wondering about that blogger who inspired me?  Here is a link to the video I saw earlier this week:  http://www.scholastic.com/teachers/top-teaching/2013/08/classroom-setup-three-hours-and-done


Tuesday, July 15, 2014

Plum Paper Teacher Planner - Editable Template

My Plum Paper Teacher Planner editable template is now available at my Teachers Pay Teachers Store!  I hope that you find it helpful!!

Hoot Away!!

Mrs. Gauger

Wednesday, July 9, 2014

Personalized Teacher Planners - Erin Condren and Plum Paper

A teacher planner is an essential tool for all teachers.  Every teacher has their personal preferences about what works best for them.  Personally, I've used a wide variety of planners since I began teaching.  I've bought the standard planners from the teacher store, I've made my own planner and hand written plans, I've made my own template and typed plans... you name it, I've tried it.  I'm always looking for a way to plan that works best for me.  This blog post will not be about what I see as the essential components to a good lesson plan.  If that is what you are looking for, stay tuned - a future post may be coming.  Today I am going to focus on the two biggest names in personalized teacher planners - Plum Paper and Erin Condren.  I have personally used both planners, and will hopefully give you plenty of information to make your own decision about which planner will work best for you.

Plum Paper planners can be purchased on Etsy.  There are many options to choose from.  You can purchase a 6 month planner starting at $16 or 12 month planner starting at $31.  You can have the classes or time periods customized in your planner for an additional fee.  Included in your planner are weekly, monthly, and year at a glance pages.  Each month includes 2 notes pages.  There are also student contacts pages, 4 student checklist pages, and a student birthday page among a few other random informational pages.  In addition to the pages that are already included you may add additional checklist pages, notes pages, and stickers for a reasonable fee.  There is a 2 sided "for keeps" paper pocket at the back of the planner.  The cover of the planner can be personalized in many ways.  When I ordered my Plum Paper planner I stuck with one of their standard designs but I've heard of many people customizing the cover choices by e-mailing Plum Paper.  The actual cover is printed on a thick card stock paper with a protective plastic cover over it.  Now for a little pictorial tour of my Plum Paper Teacher Planner.


Here is the cover of my planner with the protective plastic on top.  It is hard to see in the picture, but the year is printed on the planner.  This was a 6 month teacher planner that I ordered around Christmas break.  These planners are dated, so I did not want to order a planner including summer months I wouldn't need or use.  


Here is the cover without the protective plastic on top.  As you can see the colors are quite bright.  


After the usual page to write your name on, you find this colorful 2 page year long calendar.  


Each month begins with a divider with a laminated tab.  


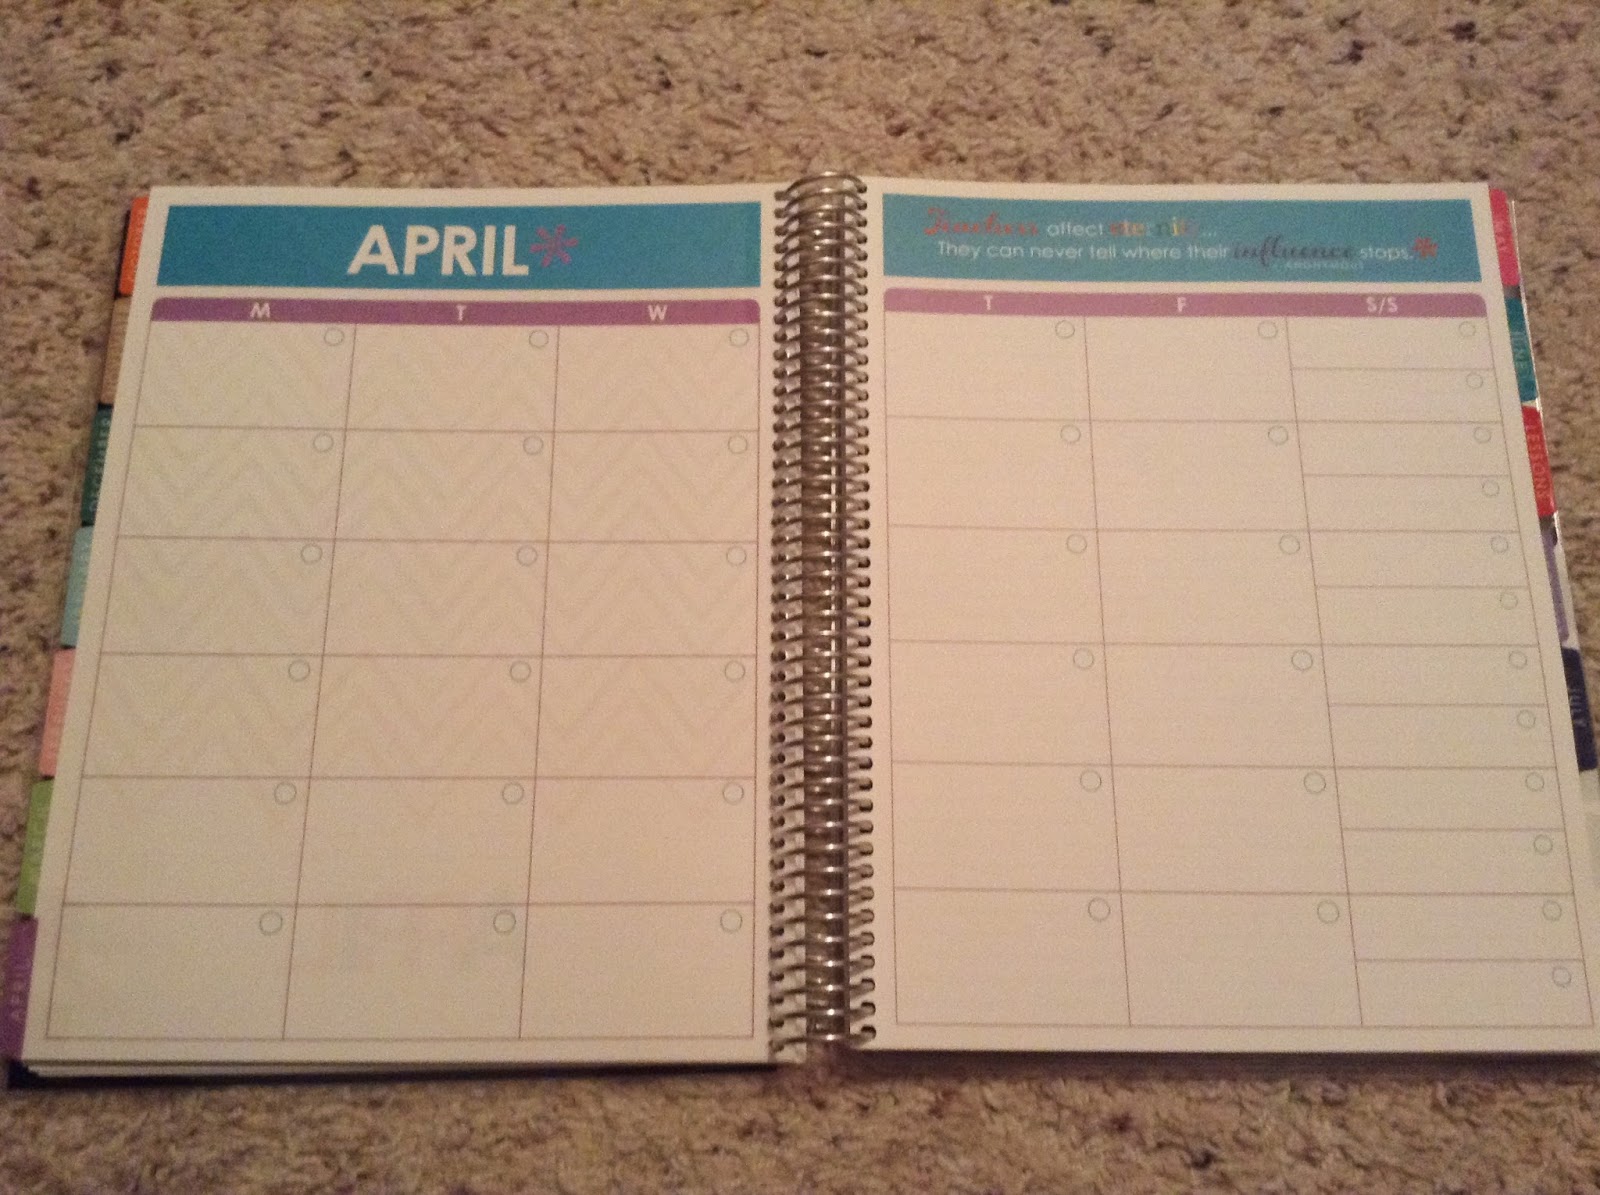
A two page monthly spread comes first each month.  


That spread is followed by the planning pages.  Please note that they are dated, so you need to choose when you would like your planner to begin when you order it.  I really liked using the weekly check list.  I also used the space for Prep Work on the right most weeks.  The Class Subjects can be customized for an additional fee.  There is a monthly calendar at the top of each weekly planning spread.  Please note that each day goes down in this planner (with the classes going across the planner).  This is the opposite of the Erin Condren Planner.


As you can see from the next two spreads when a week is spread between two months it will appear in two places.  The days in grey belong to the following month (or the previous month as the case may be).  


 I added extra checklist pages to my planner, and found that during the time I was using the planner I did like them.  They are colorful and fun.


The student contact pages would have probably been more useful to me if I had started using this planner at the beginning of the year.  Since I only used if for a few months I did not fill these in.


There is one contact page, and a special dates holiday calendar in the back.  


The very last page is a full calendar for the following year.  There is a 2 sided "for keeps" pocket in the back of the planner.  This pocket is made out of card stock.

I had trouble making this planner work for me due to it's size (more about that coming).  I tried to make the planner work by making my own template so that I could type out some of my lesson plans and then write the rest.  I will be posting this template on my Teachers Pay Teachers Store in the next few days for anyone that may find it helpful!  

UPDATE - You can find this template here:  Plum Paper Teacher Planner - Editable Template


Ultimately, the Plum Paper planner was just too small for me.  It is beautiful and the paper is very nice.  If I didn't have to write so much for each lesson, the size would have probably been fine.  SO, with that being said - here are some size comparisons.  Please remember that my Plum Paper planner was only a 6 month planner, but I did include some extra checklist and notes pages.  It is thinner than a 12 month planner would be.


Plum Paper Teacher Planner on the left, Erin Condren Teacher Planner on the right.  

As you can see the Plum Paper planner is quite a bit smaller than the Erin Condren Planner.  This could be a pro or a con depending on what you need.

Once I discovered that my Plum Paper planner was just too small for my needs I ordered an Erin Condren Teacher Planner.  For the purposes of this blog I am using my new planner (simply so I didn't have to worry about blocking out student names and information).  This planner sells for $59 (or less if you have a coupon code).  If you haven't already signed up for an account, you may use the following link to get $10 off your first order:  https://www.erincondren.com/referral/invite/amygauger0131


 Just like the Plum Paper planner, there are many options for customizing your cover.  The cover is laminated with a sturdy hard laminate.  My old planner was used heavily for 5 months and still looks good!  The ruler is included with the planner, but I also chose to add personalized note pads for $20.  These notepads can stick to the back cover of the planner.  I choose to slide my notepads into one of the sheet protectors at the back of the planner instead of sticking them to the back cover.  You'll see the sheet protectors in a minute.  

The Erin Condren planner is loaded with cute graphics and colorful quotes.  

The holiday and dates to remember page is a two page spread and very colorful.

I hope to utilize this year at a glance feature more this year.  Please stay tuned to an upcoming blog post to see how I'm using this year at a glace.  


All of the calendar spreads are at the beginning of the planner.  Each month includes a laminated tab to help you find it quickly.  This year there are actually 3 notes pages per month, which will be a welcome addition to my planner.


The calendars are large two page spreads and are undated.  Each month is colorful and includes a quote.

The planning pages are all together with a colorful laminated tab to help you find them.  Each day goes across the book.  I found that I did have enough room to write in these boxes, but as an elementary teacher I did have to write small to fit it all in.  

This year I added additional checklist pages to my planner.  There was a charge for adding the additional pages, but I'm hopeful that I'll be able to keep track of data better having it right in my plan book.

There are two pages of printed stickers and two pages of blank stickers in the plan book.

In the back you will find a two sided "Keep it Together" pocket.  Included is one heavy plastic sheet protector.  For a small fee ($3) you can add two additional sheet protectors.  I have done this both years and haven't been sorry that I did.  I use one of these sheet protectors to store one of my personalized notepads from Erin Condren.  There is also a zipper pocket just like in the life planners.  Of course, there were fun gift labels included too!  On the back cover you will find two year at a glance calendars.  


Ultimately the Erin Condren planner was a better choice for me, but mostly because of its size. This blog post is not meant to persuade you to purchase one planner over the other.  Both are very nice planners, but will appeal to different people for different reasons.  I hope that this post helped you pick the right planner for you before you place your order!!  Happy Planning!!  

Hoot!!

*Mrs. Gauger*


Sunday, July 6, 2014

Welcome!!

One week into my summer vacation and suddenly I became inspired!!  I was going through all of the files I had created this past school year and making a list of the things I wanted to get done this summer in preparation for next year.  That's when it hit me - so many of my ideas were only alive inside my own classroom!  As teachers we need to "hoot" about our work a whole lot more - there is so much to be gained for everyone when great ideas are shared!  That is when the idea of starting a blog came to me.  I chose the name Hooting About Learning very purposefully.  Hooting About Learning breaks down to "HAL(L)" - get your ideas out in the hall!!  Share them with your colleagues!!  Be a resource to your colleagues, and let them be a resource to you!  Together, we will all achieve more!  I hope you all find this blog a good teaching resource, and that you share your ideas and get them out there in our virtual hallway!  Hoot away!